This 3D model is an original, 100% human-made CAD design (not AI-generated) of a customizable, remote-controlled (RC) pirate ship built specifically around the official Makeroad RC Boat Kit.
The vessel is built in two main structural sections (lower hull and upper deck cover) and features modular accessories that allow you to customize the look of your ship.
Main Features & Modularity:
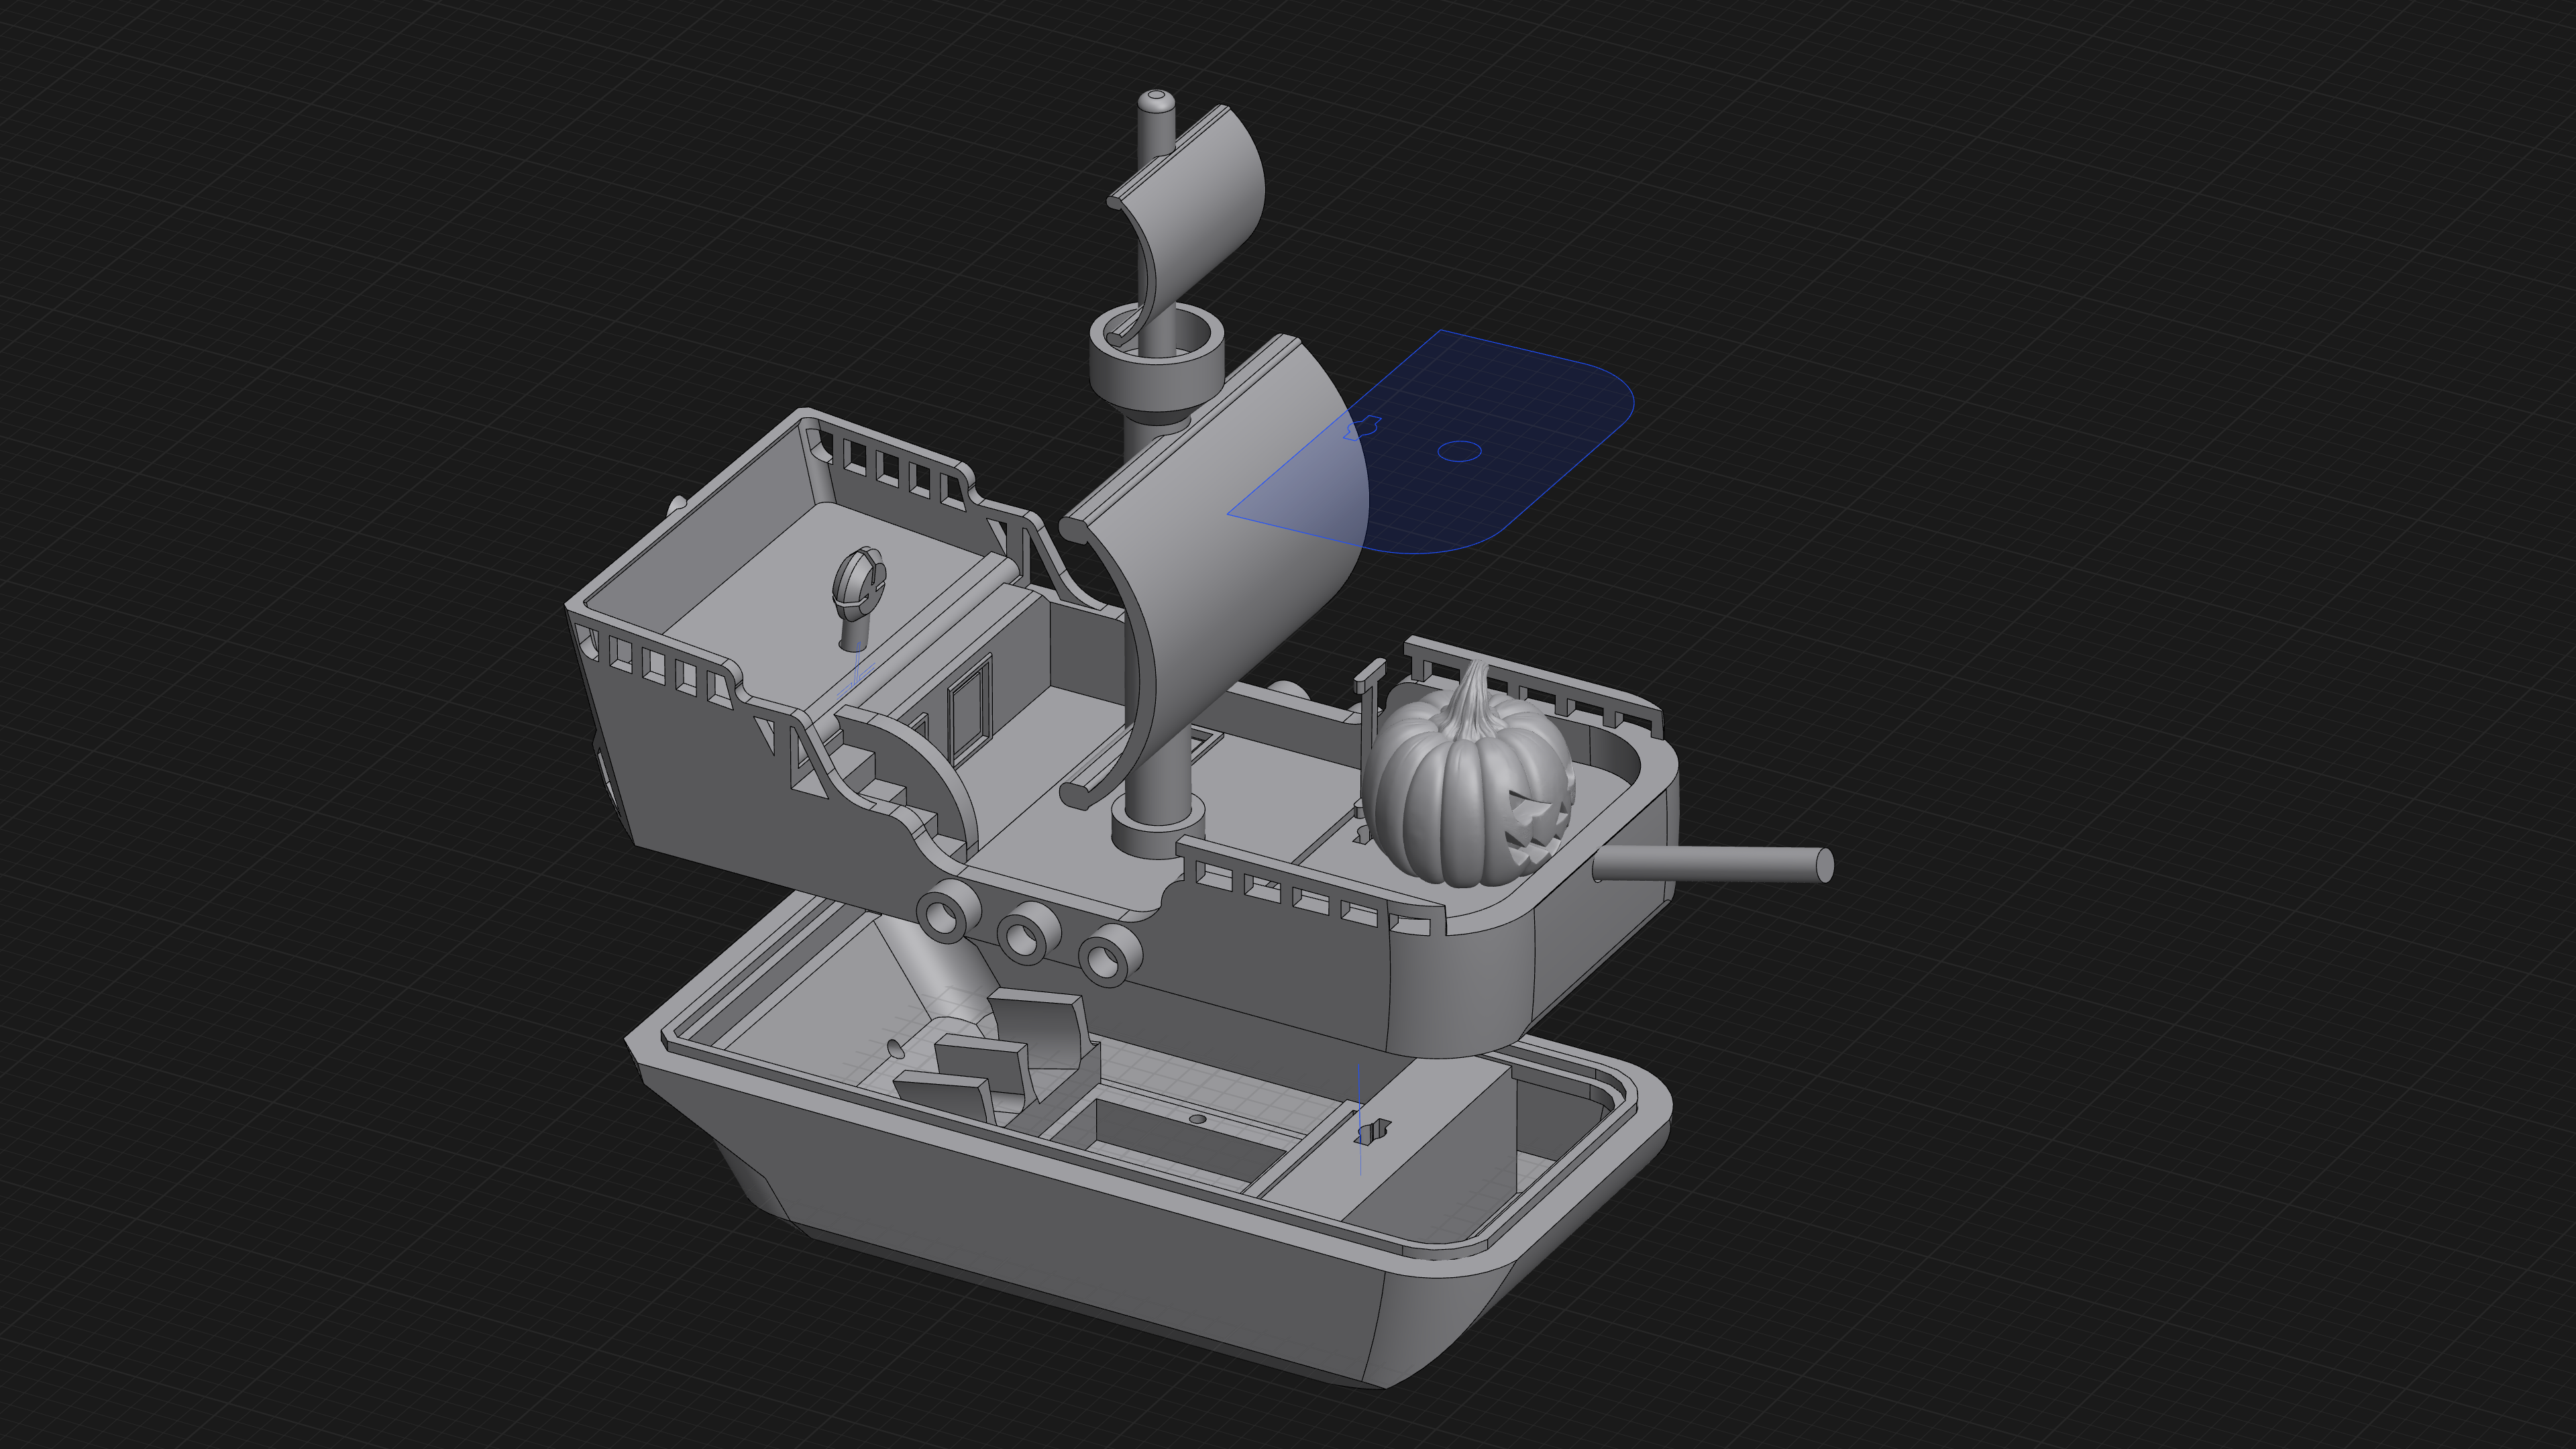
- Two-Part Hull Design: Consists of a lower hull that houses the electronics and an upper deck cover featuring stairs, cabin doors, and side railings.
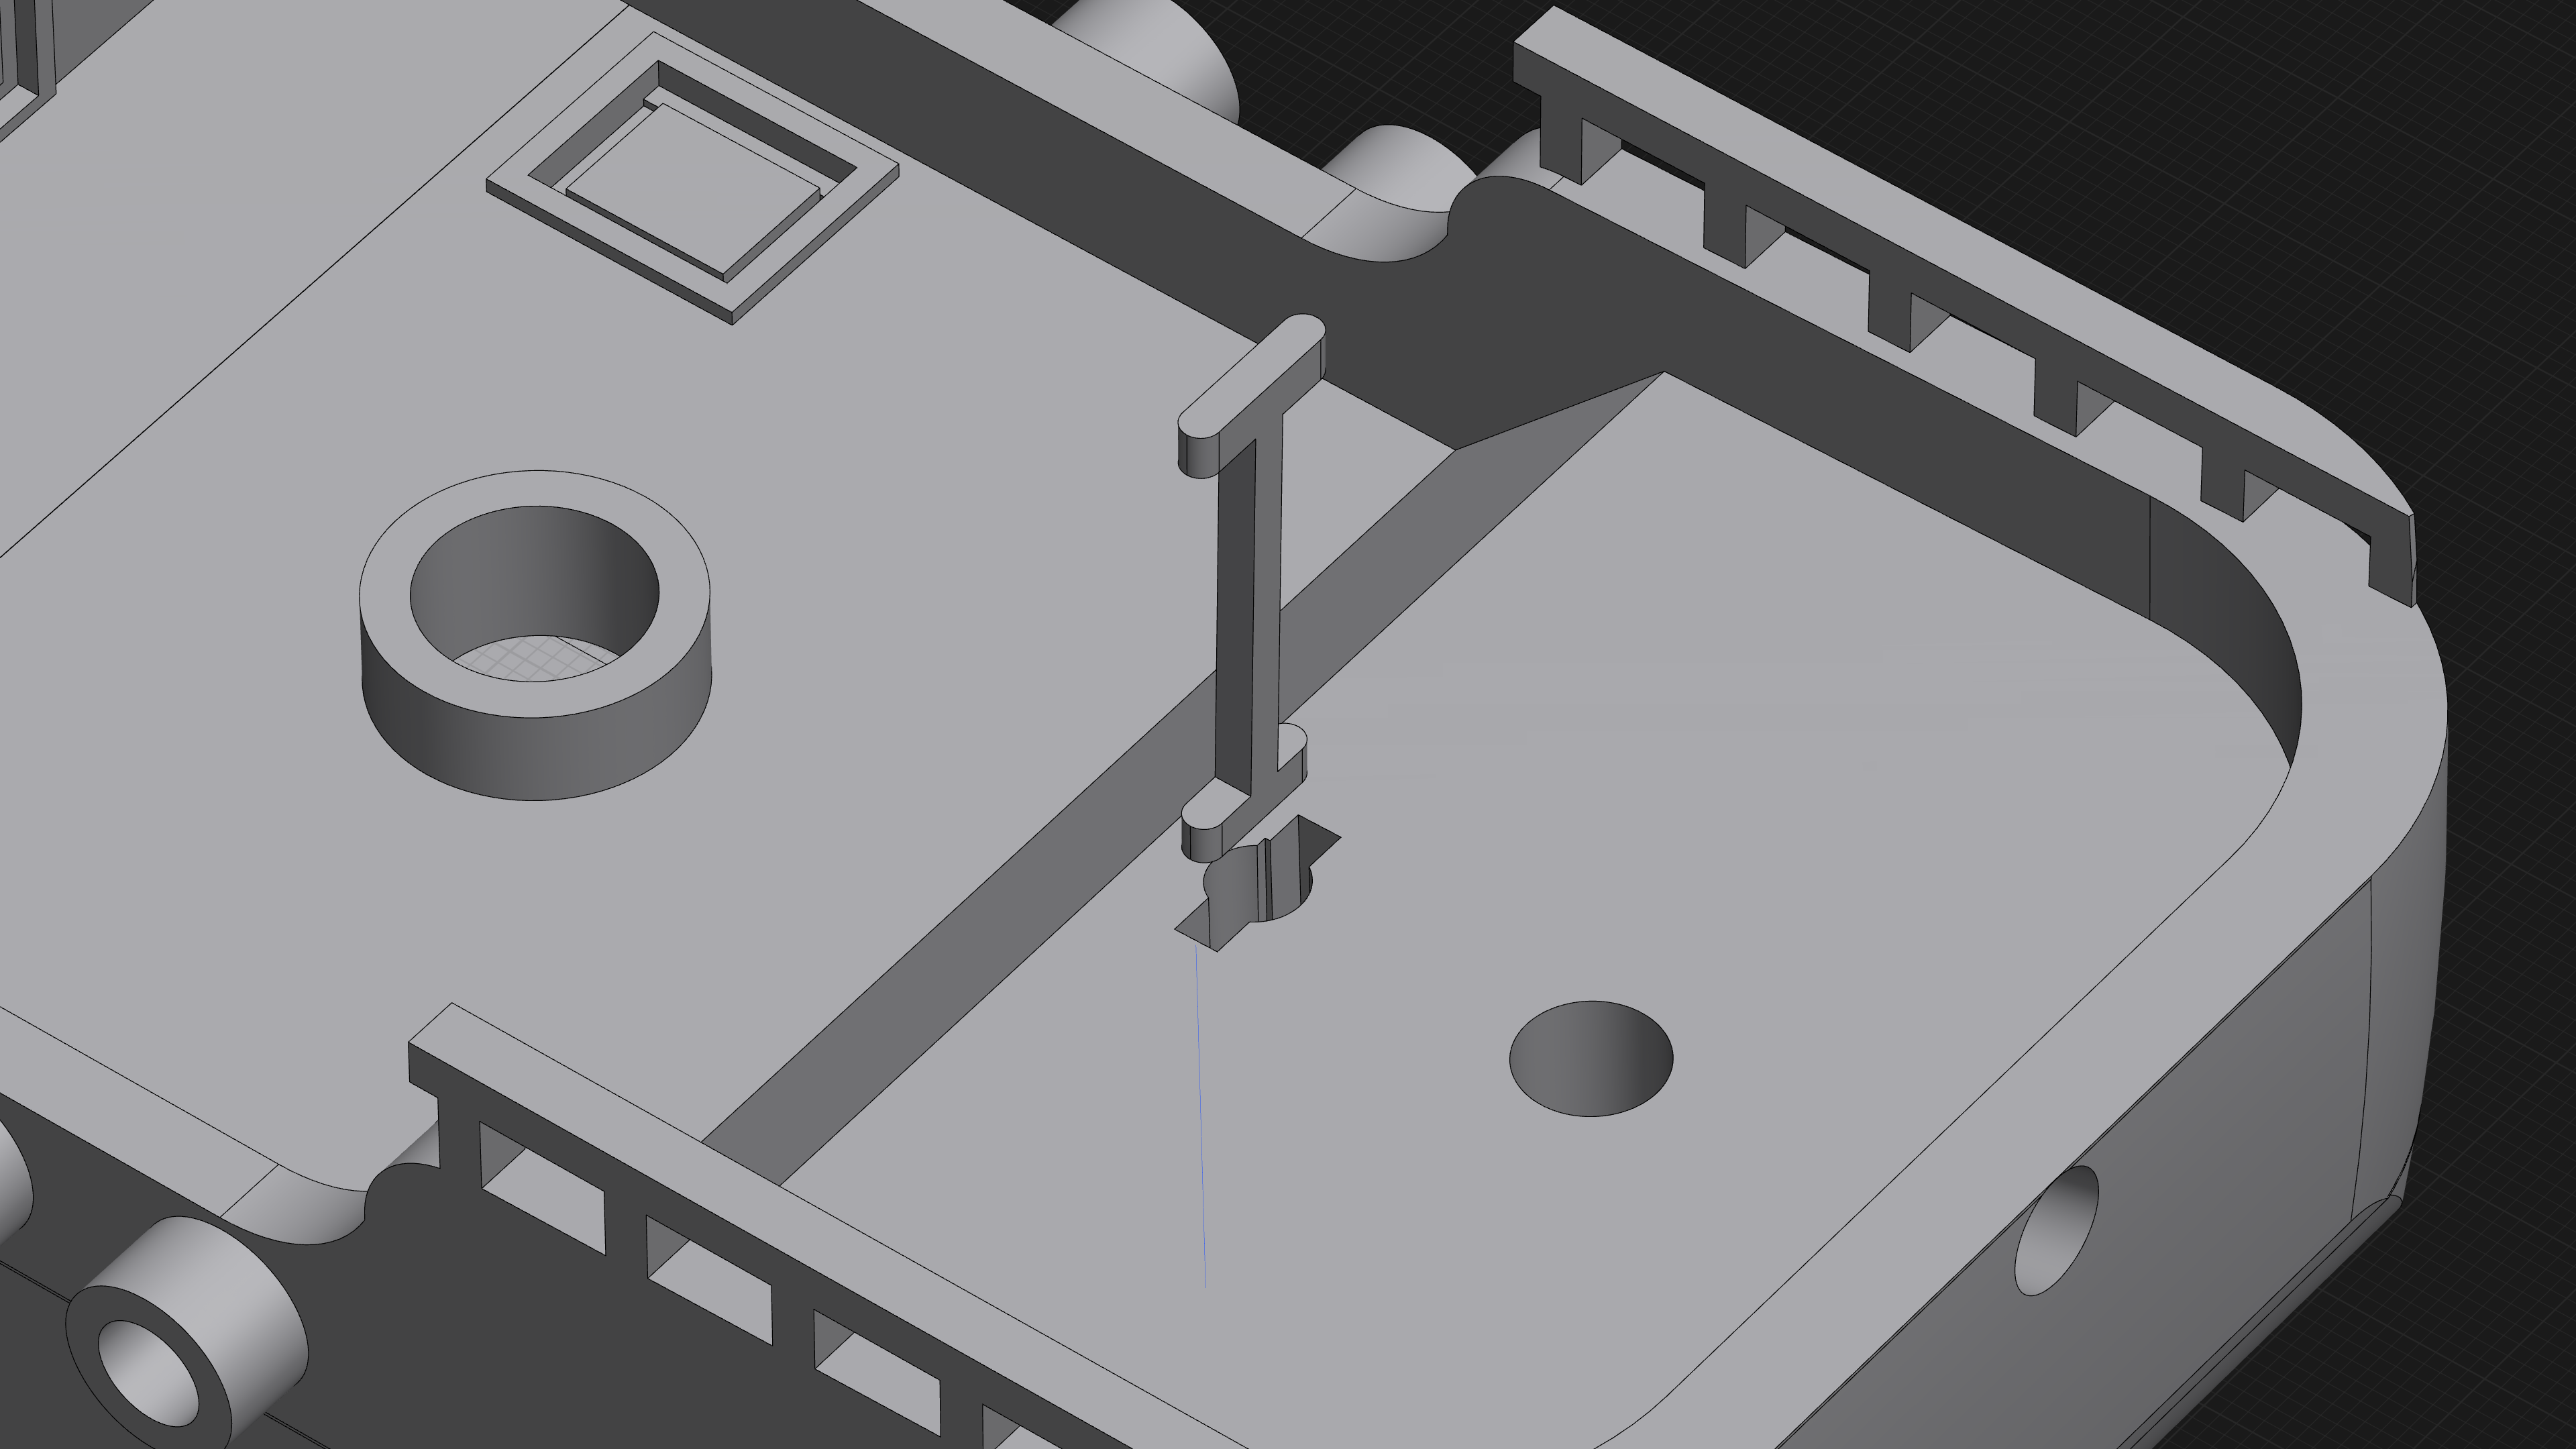
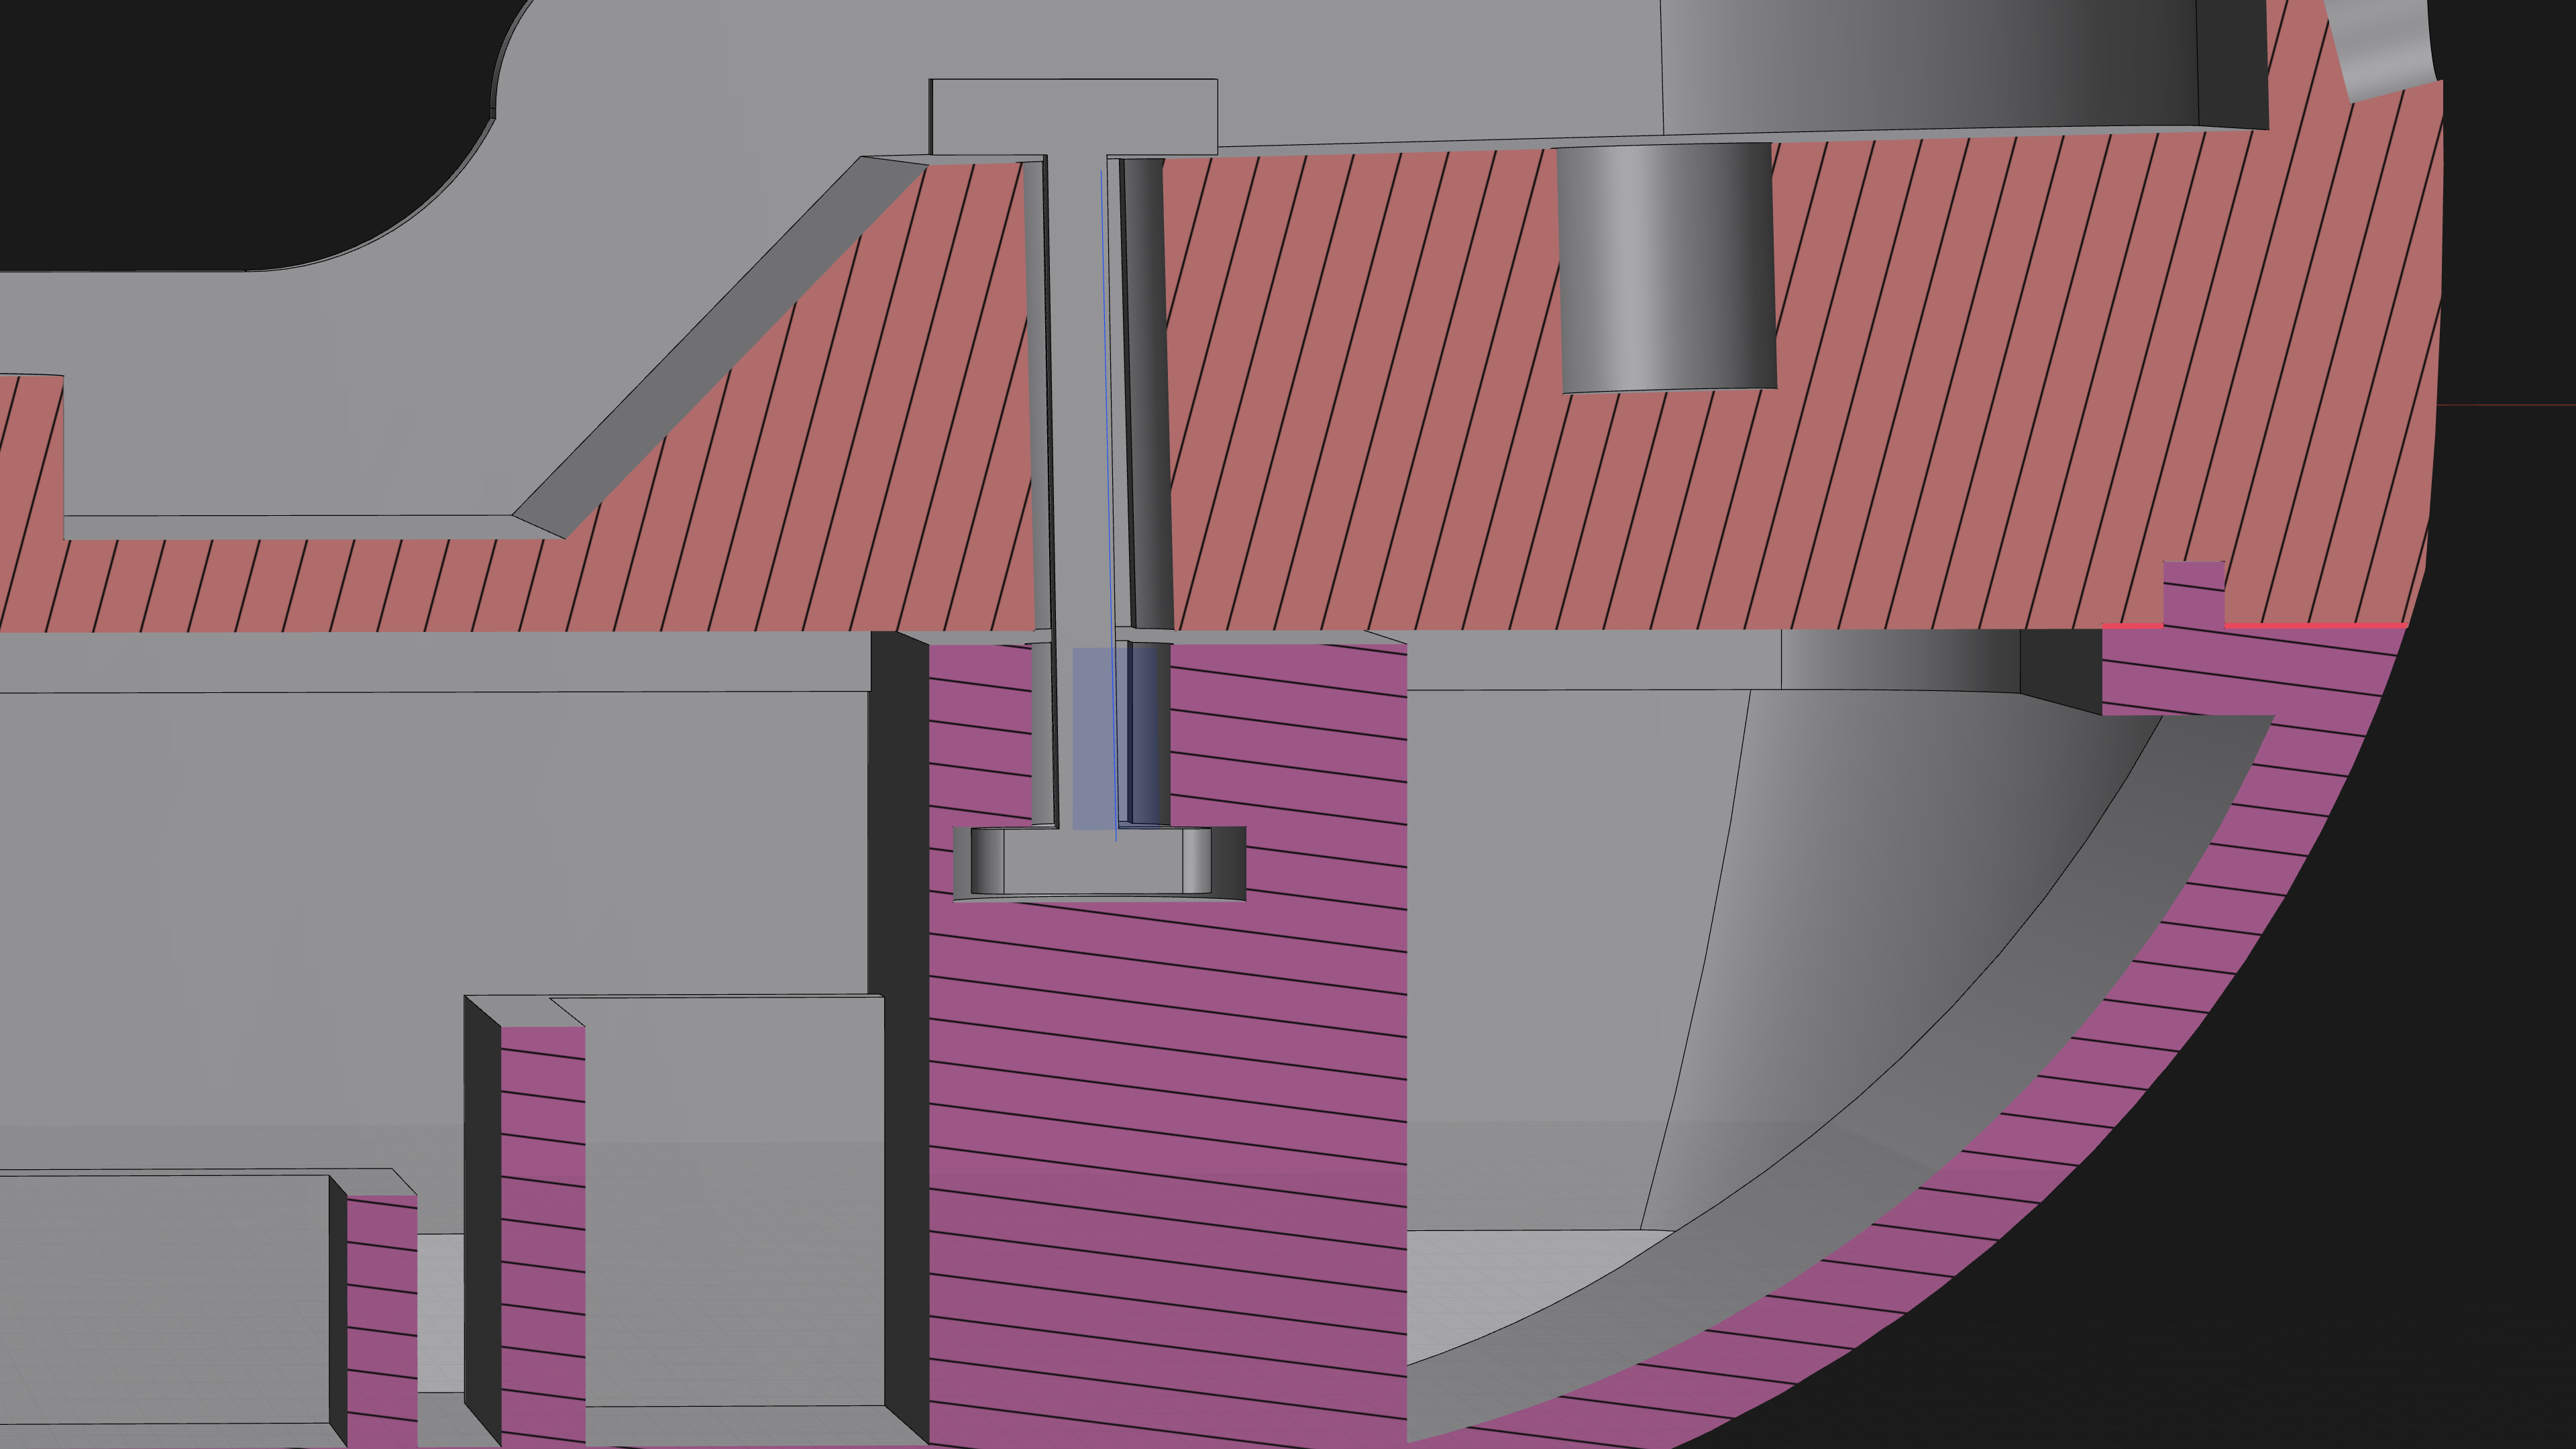
- Secure Snap-Fit & Twist-Lock Closure: The upper deck snaps firmly onto the lower hull and is further secured by a rotatable locking screw/latch mechanism to keep the cover tightly closed during navigation.
- Separate Mast & Sails: The central mast, crow's nest, front bowsprit, and curved sails are printed separately and slotted directly into the deck.
- Customizable Deck Accessories: Includes separate decorative elements such as the steering wheel/helm at the stern and a removable pumpkin on the bow. The deck layout allows anyone to easily swap or design custom accessories to fit different themes.
- Custom Color Schemes: Parts are separated and accented so you can print the hull, trim railings, sails, and accessories in any color combination you prefer.
Required Hardware (Makeroad RC Boat Kit):
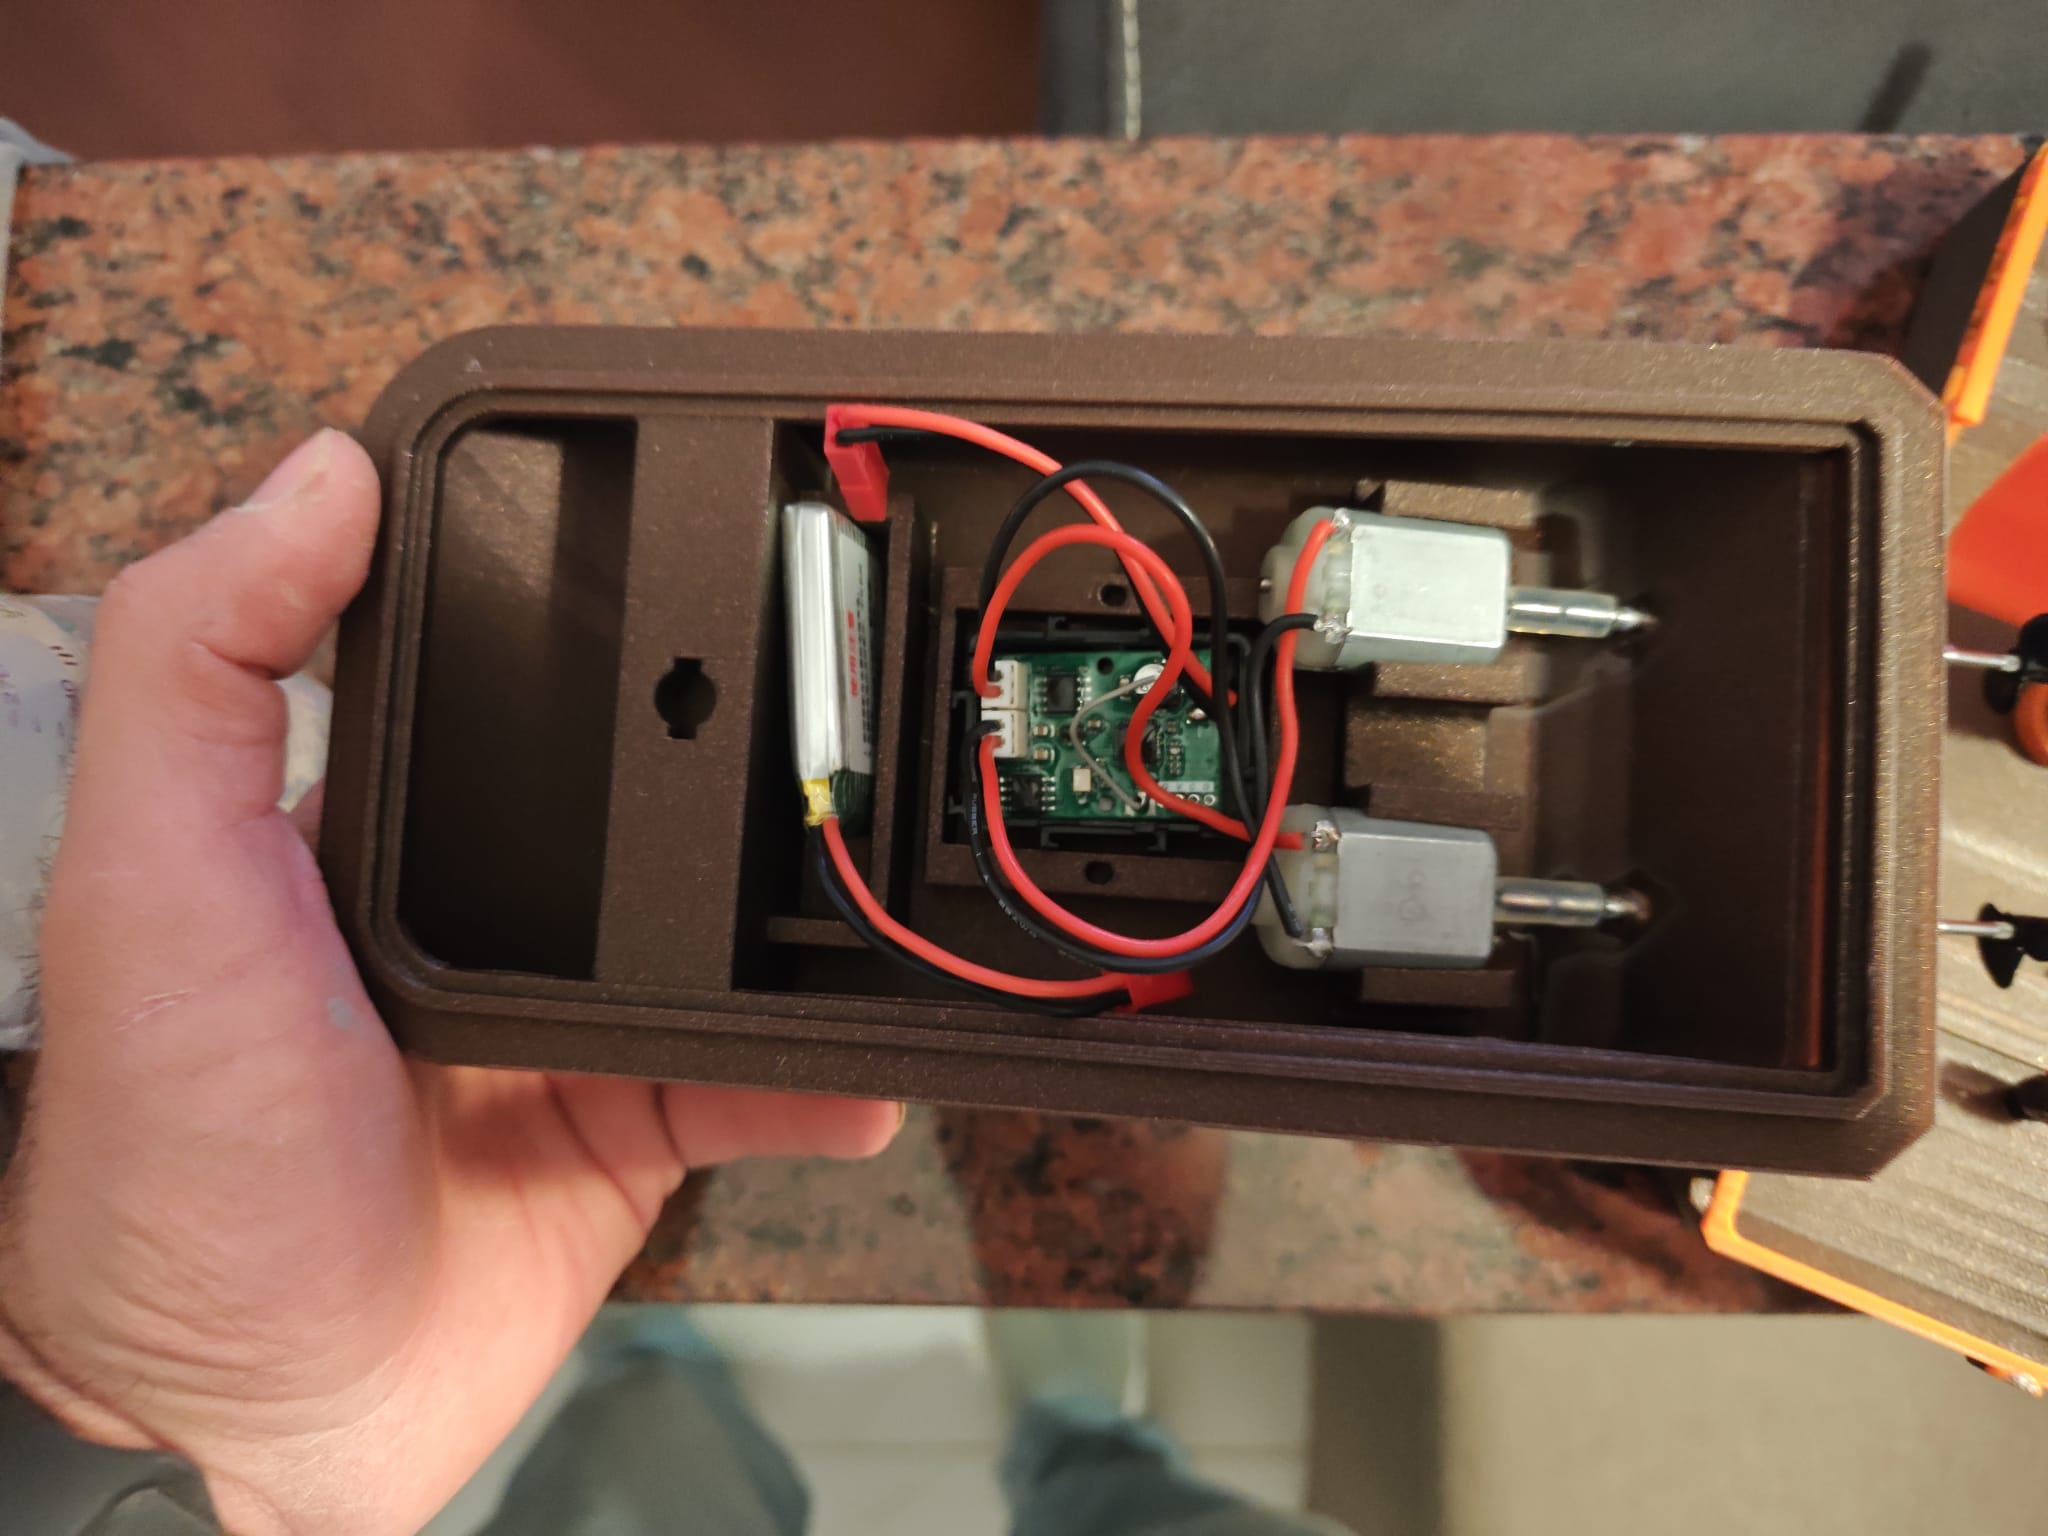
- 2x DC Motors with propeller shafts and twin propellers
- 1x RC Receiver / Motor controller board
- 1x Rechargeable Battery pack
Assembly & Waterproofing Instructions:
- Motor & Shaft Installation: Insert the two DC motors and their propeller shafts through the stern channels in the lower hull.
- CRITICAL - Waterproofing the Shafts: Apply a generous amount of hot glue, silicone sealant, or marine-grade waterproof adhesive around the propeller shaft housings/tubes where they pass through the hull. This step is essential to prevent water from leaking inside the electronics bay when the boat is on the water.
- Electronics Setup: Connect the two DC motors and the battery to the receiver board, securing the components neatly inside the lower hull to keep the center of gravity balanced.
- Deck & Accessories Assembly: Insert the steering helm into the rear deck, place the pumpkin (or your custom accessory) on the front deck, and press the assembled mast and sails into the central socket.
- Closing the Hull: Align the upper deck with the lower hull, press down until the snap-fit engages, and turn the locking screw to secure both halves together before placing the boat in the water.
Recommended Print Settings:
- Material: PLA, PLA+, or PETG (PETG is recommended for the lower hull for enhanced water resistance and durability).
- Wall Loops (Perimeters): Minimum 2 to 3 walls on the lower hull to guarantee a watertight outer shell.
- Bottom/Top Shell Layers: 4 to 5 layers to prevent water seepage through the bottom of the boat.
- Infill: 15% - 20% (Gyroid or Grid pattern) to balance structural strength and buoyancy.


 3D Preview


 8
 0
 7
 6
 1
 171
 Claim


 Uploaded Print Makes











Comment(0)